
Concrete Curbing 101: How To Do It Yourself
So you've been watching landscape curbing videos online and now you're wondering: how hard can this actually be? It's a fair question that deserves a straight answer before you rent equipment or order a truckload of concrete.
After installing decorative concrete landscape curbing for hundreds of Charlotte homeowners, Everedge Curbing has a clear view of what the DIY version looks like. So here's the honest walkthrough: every step of the process, what you actually need at each one, and where the real difficulty shows up. If you still want to attempt it after reading this, you'll go in with open eyes.
How To Do Concrete Curbing: The Step-by-Step Process
Concrete landscape curbing follows a defined sequence. Here's how the process unfolds from start to finish.
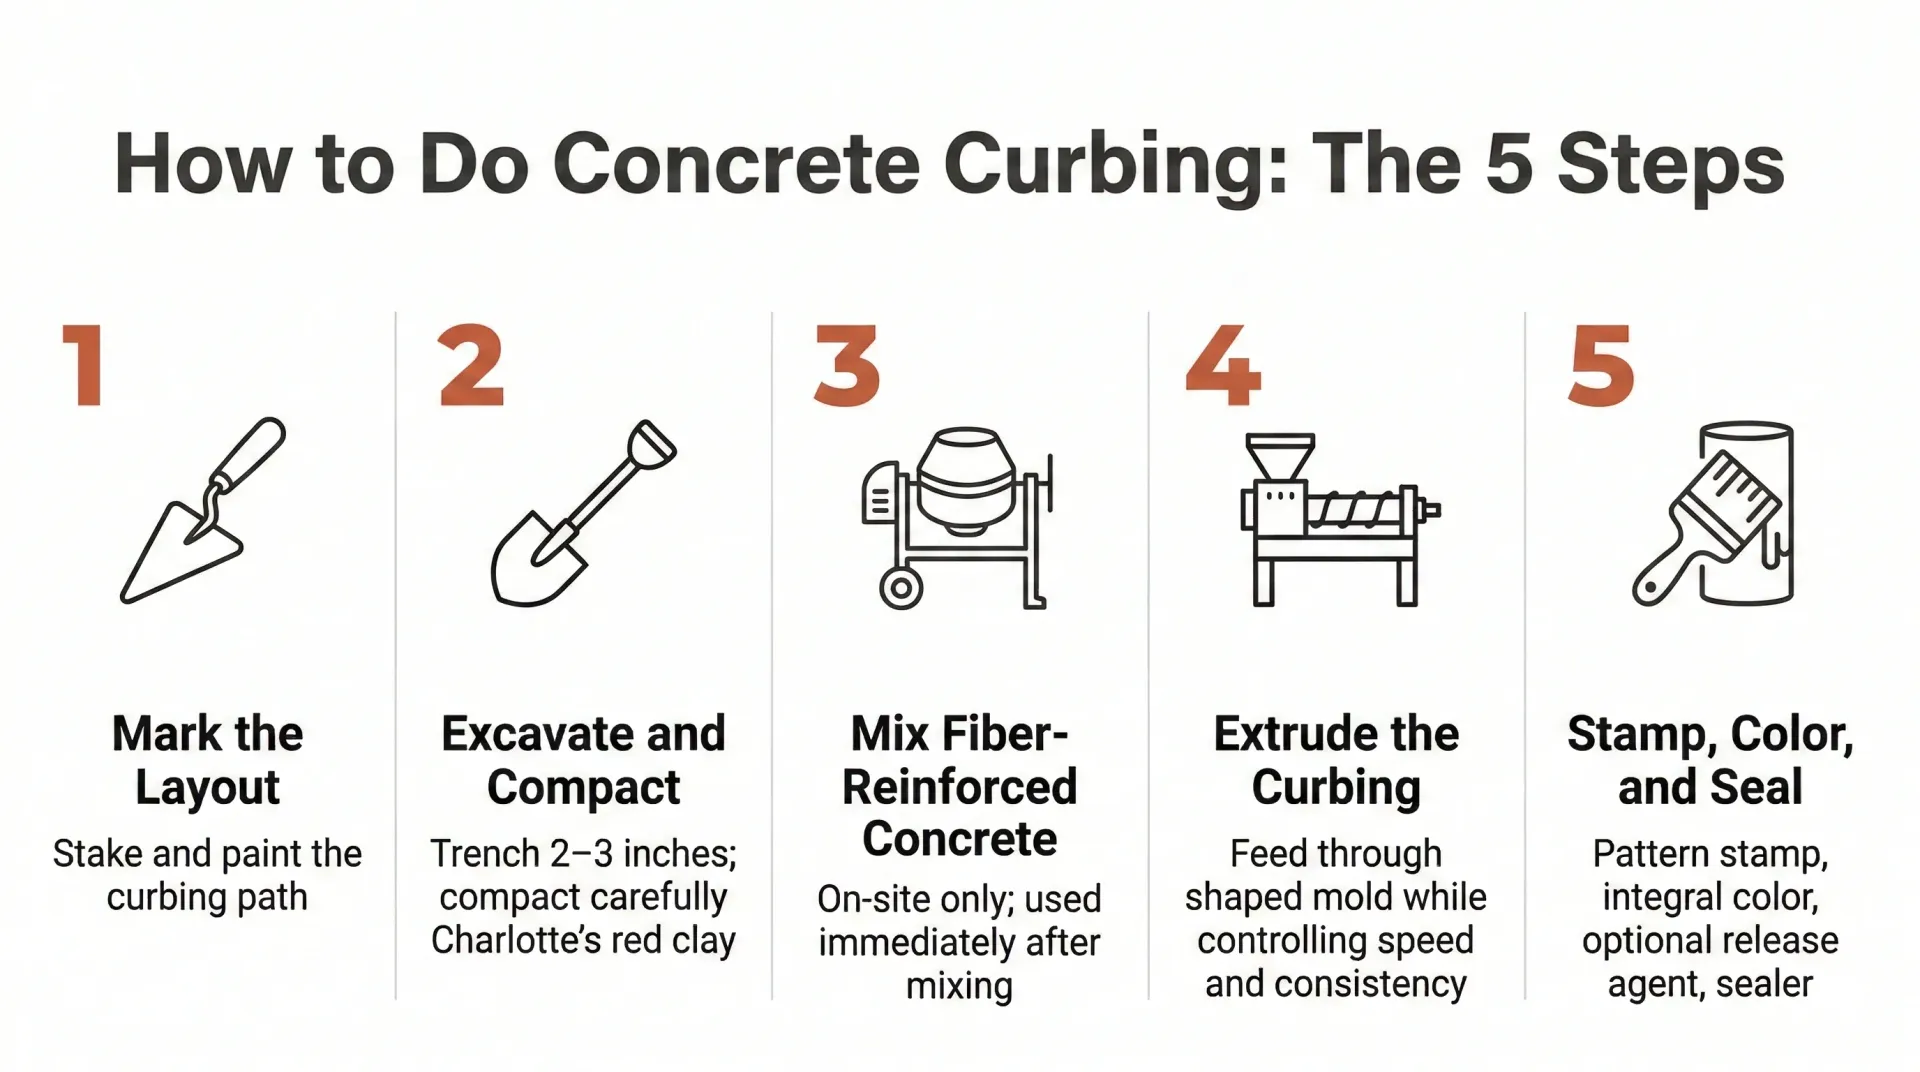
Step 1: Mark the Layout
Start by marking the curbing path using stakes and a flexible garden hose or marking paint. This sounds simple, but achieving smooth, consistent curves—especially around flower beds with tight inside corners—takes several rounds of adjustment. Spray paint won't wash away. Mark the wrong line and every step that follows is built off a flawed starting point.
Step 2: Excavate and Compact the Base
Dig a trench along your marked path, typically 2 to 3 inches deep, and compact the base thoroughly using a plate compactor. Charlotte's Piedmont red clay complicates this step more than most homeowners expect.
Clay compacts unevenly and retains moisture, which causes it to swell and shift with seasonal rainfall. Charlotte’s significant annual rainfall can lead to base movement, the most common reason DIY curbing heaves or cracks within the first year.
Step 3: Mix the Concrete On-Site
Concrete curbing isn't mixed from bags and wheelbarrows. The mix must be fiber-reinforced for structural durability, prepared to a very specific consistency, and used immediately. It cannot be batched in advance.
You'll need a concrete mixer capable of producing a consistent, workable fiber-reinforced mix. If the consistency is off, the extrusion machine won't feed correctly. Too wet, and the curbing slumps after it exits the mold. Too dry, and the machine stalls mid-run.
Step 4: Extrude the Curbing
This is the step that separates concrete curbing from every other landscape edging option. A curbing extruder feeds the concrete through a shaped mold while moving continuously along the marked path. The operator controls feed rate, machine speed, and concrete consistency in real time.
Renting commercial units costs $200–$400 per day in the Charlotte area. Operating one around tight curves without visible inconsistencies takes practice. Most homeowners understand what the machine is telling them only after the concrete has already set.
Step 5: Apply Pattern, Color, and Sealer
Once the concrete is extruded and approaching the right consistency (not fully set, but firm enough to hold detail), pattern stamps are pressed into the surface. Timing here is narrow. Stamp too early and the impression blurs; too late and the surface resists.
After stamping, integral colorant is worked into the surface, and an optional release agent can be applied over the base color to create a two-tone, dimensional finish. After curing, a professional-grade sealer is applied to protect the color and surface against UV exposure and moisture. Without the sealer, Carolina summers can fade the color much faster and leave the surface more vulnerable to moisture.
Where the Process Gets Complicated in Charlotte
Charlotte's soil and climate introduce two variables that affect long-term performance in ways most DIY guides don't address.
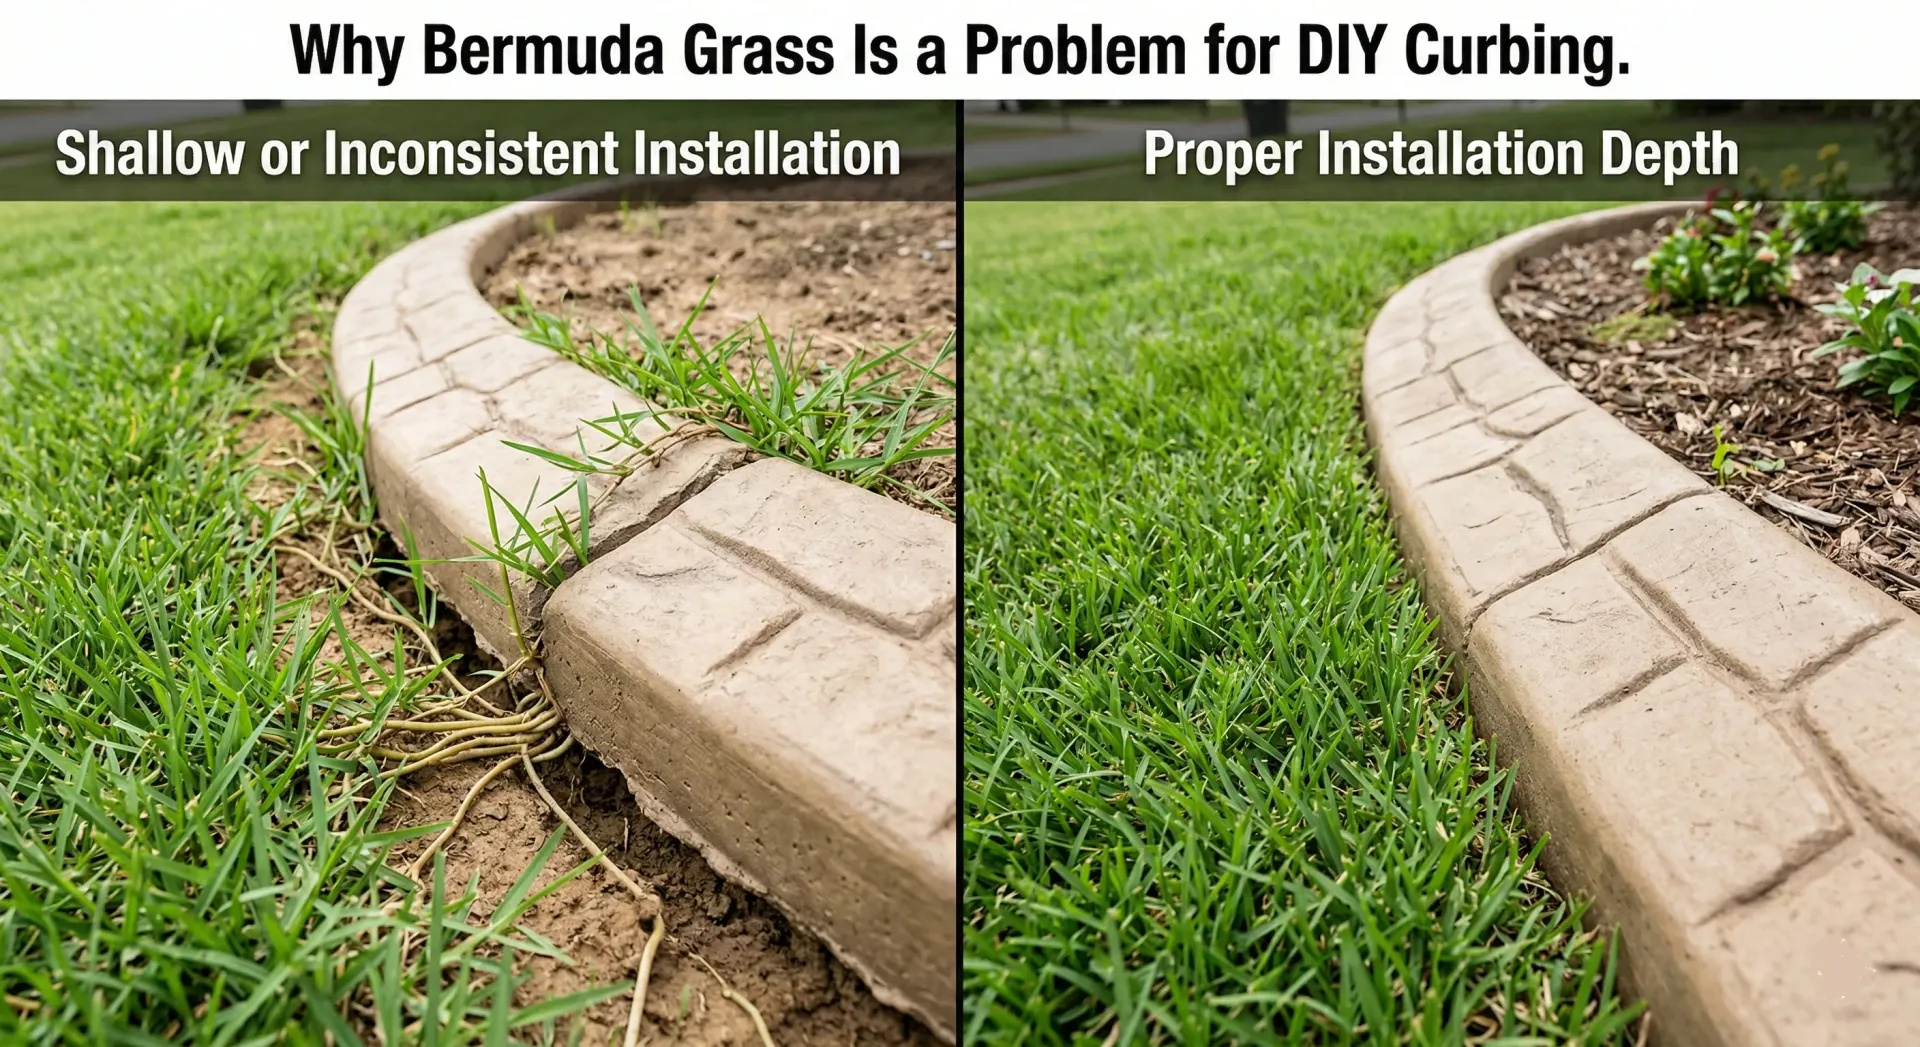
Bermuda Grass
Bermuda grass spreads underground via rhizomes—roots that push through any gap at the curbing base. Proper installation depth seals that gap while a shallow or inconsistent extrusion leaves the opening Bermuda needs.
Expansion Joints
The second factor is expansion joints: without cuts placed at the right intervals for Charlotte's temperature range, long curbing runs will crack on their own schedule. Getting that spacing right comes from field experience, not the instruction sheet.
If you're still weighing whether concrete curbing is right for your landscape, our post on the Top 4 Materials for Landscape Edging can give you a fuller picture.
What Professional Installation Includes
The equipment, materials, and technique all present real learning curves, with mistakes that tend to show up after the concrete has already set. For most Charlotte homeowners, professional installation isn't just the easier path; it's the one that holds up through Carolina clay, summer storms, and temperature swings.
Everedge Curbing handles everything covered in this guide in a single day. Every project includes:
- Site marking and excavation
- On-site concrete mixing with fiber reinforcement
- Extrusion, stamping, and coloring
- Professional-grade sealer
- Proper base compaction for Charlotte's clay soil
- Correct expansion joint placement
- Final walkthrough before we leave the property
Our documented installation process covers each of these steps in detail.
When you add up equipment rental, materials, and a realistic chance at a second attempt, the cost difference between DIY and professional narrows faster than most people expect. Contact Everedge Curbing to request a free, no-obligation estimate.
Most Charlotte homeowners are surprised by how accessible the price point is—and how little they miss the rental equipment.